vue-cli3 使用svg 方法

前言

  • 写项目遇到使用 svg 很久之前在 html 上用过
  • 在 vue 上使用还是第一次弄了好久,最后找到了两种方法
  • 第一种是官网上的还有一直是基于 webpack 的
  • svg 好处还是很多的,可随意变更图片颜色
  • 第二种方法封装了使得用起来更加的方便,不过配置的时候稍微有一点点麻烦

工具/资料

  • 系统 macOs 10.13.3
  • 开发工具 vs code
  • 文档 npmjs.com
  • svg: https://www.iconfont.cn/
  • vue-cli3 项目
  • webpack 4.0 以上
  • npm cnpm yarn 其中一种
  • 第一方法插件 vue-svg-loader vue-template-compiler
  • 第二方法插件 svg-sprite-loader

开始

1. 第一种方法官网默认(vue-svg-loader)

  1. 安装插件(sudo 非苹果系统不需要加)
1
$ sudo cnpm i -D vue-svg-loader vue-template-compiler
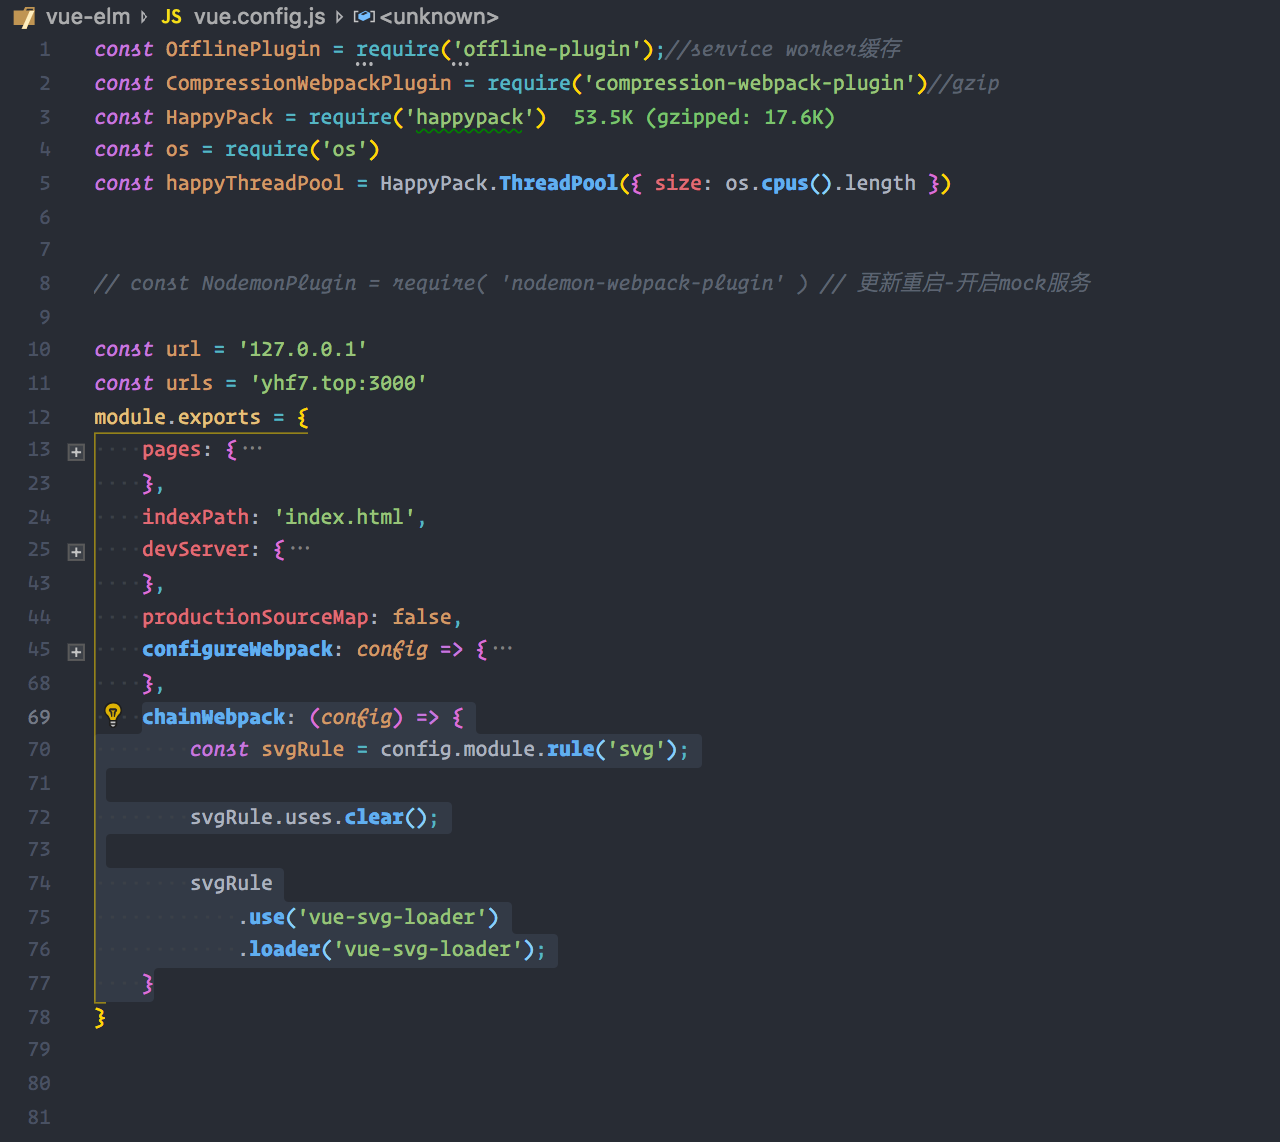
  1. 配置 webpack(vue.config.js)
1
2
3
4
5
6
7
8
9
10
11
module.exports = {
chainWebpack: (config) => {
const svgRule = config.module.rule('svg');

svgRule.uses.clear();

svgRule
.use('vue-svg-loader')
.loader('vue-svg-loader');
}
}

svg

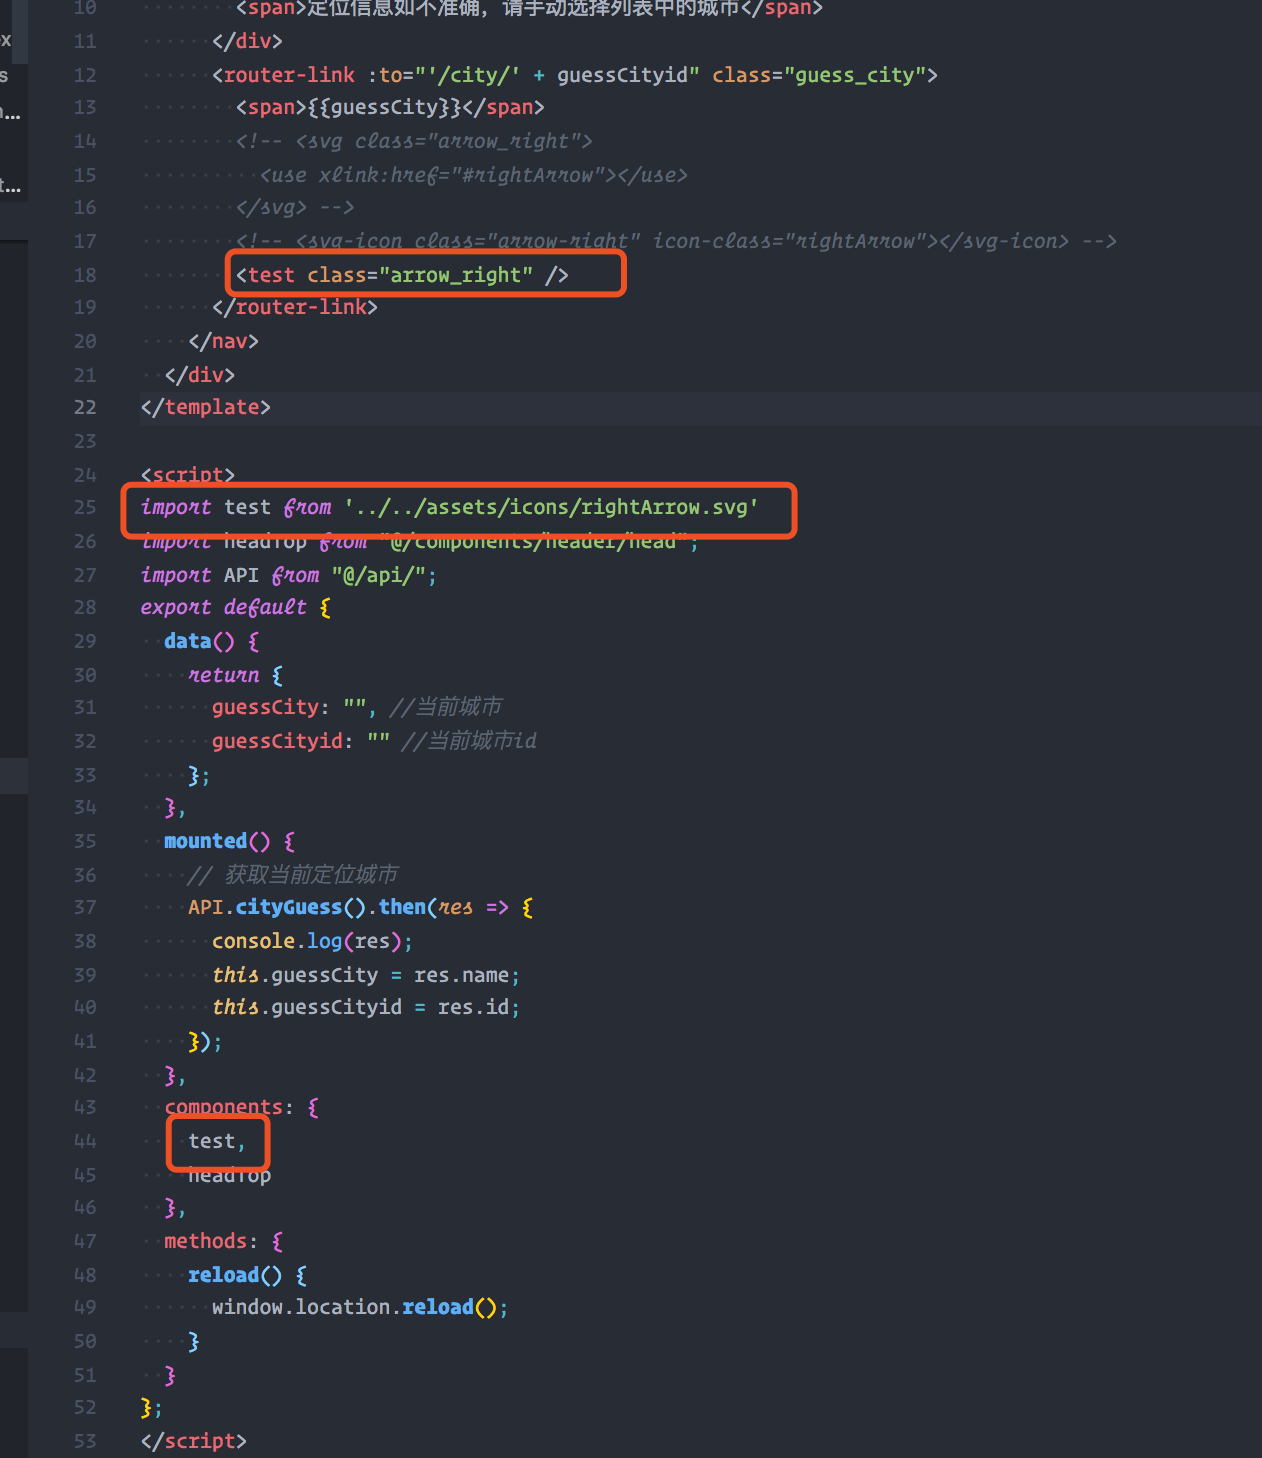
  1. 引入 svg 使用(和用组件一样)
1
2
3
4
5
6
7
8
9
10
11
12
13
14
15
16
17
18
19
20
21
<template>
<div>
<test />
</div>
</template>

<script>
import test from '../../assets/icons/rightArrow.svg'
components: {
test
}
</script>

<style lang="scss" scoped>
.arrow_right {
@include wh(0.6rem, 0.6rem);
path { // 在path改变颜色,通过fill属性
fill: red;
}
}
</style>

svg

  1. 查看效果(这里我写了 css 的)
    svg

2. 第二种方法在网上找到的别人封装了的(svg-sprite-loader)

  1. 安装插件
1
$ sudo cnpm i svg-sprite-loader -S
  1. 配置 vue.config.js
1
2
3
4
5
6
7
8
9
10
11
12
13
14
15
16
17
18
19
20
21
22
23
24
const path = require("path");
function resolve(dir) {
return path.join(__dirname, dir);
}

module.exports = {
chainWebpack(config) {
config.module
.rule("svg")
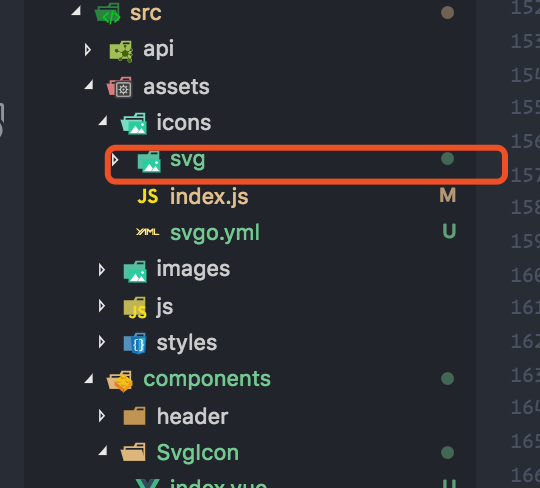
.exclude.add(resolve("src/assets/icons")) // icons存放地(svg放的地方)
.end();
config.module
.rule("icons")
.test(/\.svg$/)
.include.add(resolve("src/assets/icons")) // icons存放地(svg放的地方)
.end()
.use("svg-sprite-loader")
.loader("svg-sprite-loader")
.options({
symbolId: "icon-[name]"
})
.end();
}
};
  1. 配置封装 svg 组件
  • 在 components 创建组件 (/SvgIcon/index.vue)
1
2
3
4
5
6
7
8
9
10
11
12
13
14
15
16
17
18
19
20
21
22
23
24
25
26
27
28
29
30
31
32
33
34
35
36
37
38
39
40
<template>
<svg v-else :class="svgClass" aria-hidden="true" v-on="$listeners">
<use :xlink:href="iconName" />
</svg>
</template>

<script>

export default {
name: 'SvgIcon',
props: {
iconClass: {
type: String,
required: true
},
className: {
type: String,
default: ''
}
},
computed: {
iconName() {
return `#icon-${this.iconClass}`
},
svgClass() {
if (this.className) {
return 'svg-icon ' + this.className
} else {
return 'svg-icon'
}
},
styleExternalIcon() {
return {
mask: `url(${this.iconClass}) no-repeat 50% 50%`,
'-webkit-mask': `url(${this.iconClass}) no-repeat 50% 50%`
}
}
}
}
</script>
  1. 配置引入组件(icons 目录下建立 index.js 文件)
1
2
3
4
5
6
7
8
9
import Vue from "vue";
import SvgIcon from "@/components/SvgIcon"; // svg component

// register globally
Vue.component("svg-icon", SvgIcon);

const req = require.context("./svg", false, /\.svg$/);
const requireAll = requireContext => requireContext.keys().map(requireContext);
requireAll(req);

svg

  1. 引入 svg 配置文件(main 引入)
1
import "@/assets/icons";
  1. 使用 svg (无需引入只需要用 svg-icon 标签即可)
1
2
3
4
5
6
7
8
9
10
<template>
<svg-icon class="arrow_right" icon-class="rightArrow" />// 这里icon-class写的就是svg文件的名字
</template>

<style lang="scss" scoped>
.arrow_right {
@include wh(0.6rem, 0.6rem); // 控制大小
fill: red; // 控制颜色
}
</style>

后记

-------------本文结束感谢您的阅读-------------
0%